How email synchronisation works
If it is also true that
a) in the Settings of the Companies section (Basic Settings section) of the Caflou account, "Synchronize email communication" is enabled (set by the account administrator)
b) the user who wants to synchronise their emails has enabled synchronisation in their profile
c) and subsequently in the linked email of the user (see point b) a message appears from or for the email address listed with the company or in the company's contacts and the position of the email corresponds to the synchronization settings (according to the Settings in the Companies section - it is possible to monitor the sender/recipient/copy/blind copy positions)
➡ then the message is saved under the company (or project or task) as a comment (including the attachment, if selected in the synchronization Settings in the Companies section).
🕟 Synchronization takes place in cycles with an interval of 10 minutes (e.g. 7:00, 7:10, 7:20 etc.).
How to set up synchronisation
1) A user with access to Account Settings will set in the Company Settings section whether to sync emails in that account:

- Choose from which positions to synchronize e-mails (from the position of e-mails listed in companies and contacts):
- Blind carbon Copy (BCC) - the e-mail listed in the company or in the company's contacts is the recipient of the e-mail in blind carbon copy
- Carbon Copy (CC) - the e-mail listed in the company or in the company's contacts is the recipient of the e-mail in carbon copy
- Recipient (TO) - the e-mail listed in the company or in the company's contacts is the direct recipient of the e-mail
- Sender (FROM) - the e-mail listed in the company or in the company's contacts is the sender of the e-mail
- Choose whether to also upload e-mail attachments to CAFLOU
- Choose whether to automatically assign the e-mail directly to the project or task (in the subject of the e-mail it is necessary to state a unique project/task ID in the form #1234#, e.g. "RE: I am expanding the project assignment #1234#")
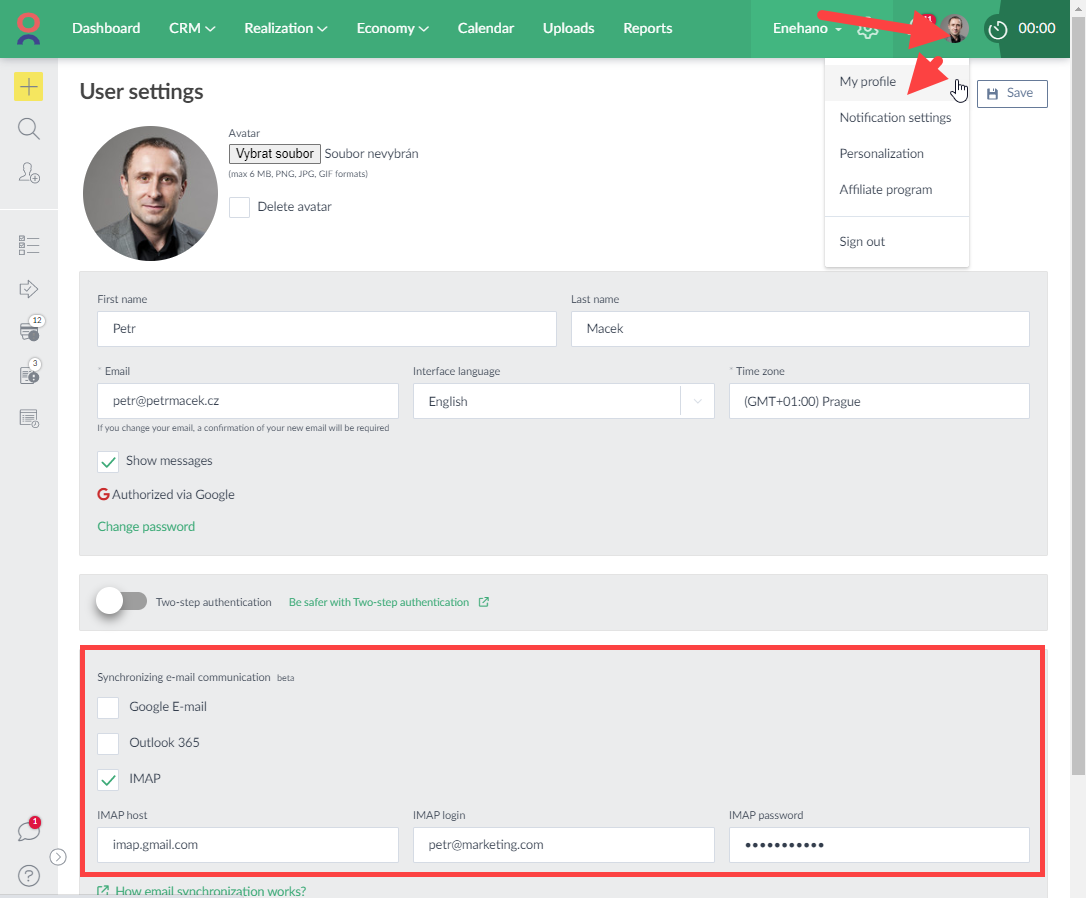
2) Each user whose emails need to be synchronized needs to set their own synchronization in their Profile Settings:
Options for synchronization of emails
- Google email
- Outlook 365 email
- General email (synchronisation via IMAP (can also be used for Google email))
Instructions for these methods are given in turn below:
1) Connection for Google emails (Gmail)
Recommended procedutre for integrating your Google e-mails to Caflou:
- *In the administration of your company Google account (Google Admin), add Caflou as a verified third-party application
- Direct link is https://admin.google.com/u/2/ac/owl/list?tab=configuredApps or use navigation: Security->Access and data control->API controls->Manage third-party app access->Add app (with Client ID)
- Client ID for Caflou is 275497493680-6fatnhnlrej17qb0l3ol75rd8npvq5ud.apps.googleusercontent.com
- In the My Profile settings in Caflou, in section "Synchronizing e-mail communication", each user whose emails are to be monitored selects the "Google Email" option and then the "Google" icon and proceeds to authenticate as instructed (usually by entering the email, password or second authentication factor).
*If you do not perform step 1, you can continue to use sync and continue with the next setup steps, however when allowing CAFLOU to access the e-mail, CAFLOU be displayed as an unverified application.
After performing the above steps, Caflou will start synchronizing the e-mails.
2) Connection for Outlook 365 email
- In the user settings of My Profile in Caflou, in the section "Synchronizing e-mail communication", each user whose emails are to be monitored selects the "Outlook 365" option
- The user then clicks on the "Microsoft" icon and proceeds to authenticate as instructed (usually entering email, password, or second authentication factor).
- *If you are the first user in your business account to set up synchronization, you will need to request your Microsoft business account administrator to approve synchronization in your account.
- Once Microsoft authentication occurs, you may need to fill in the information below and save the Profile Settings:
- IMAP host: outlook.office365.com
- IMAP login: your email address for synchronization
- Once saved, the synchronization will be activated.
*As part of the synchronization approval by Microsoft business account administrator, the first user enters the reason for the approval request. The Microsoft business account administrator will be notified of the request by email. He or she then enables the Caflou synchronization option in the Microsoft Azure administration, in the Azure Active Directory, in the Enterprise Applications section, in the Admin consent requests activity. Here, he selects the "Review permissions and consent" action and accepts the requested permission. Additional users will not need to make this request.
3) Connection for general email (via IMAP)
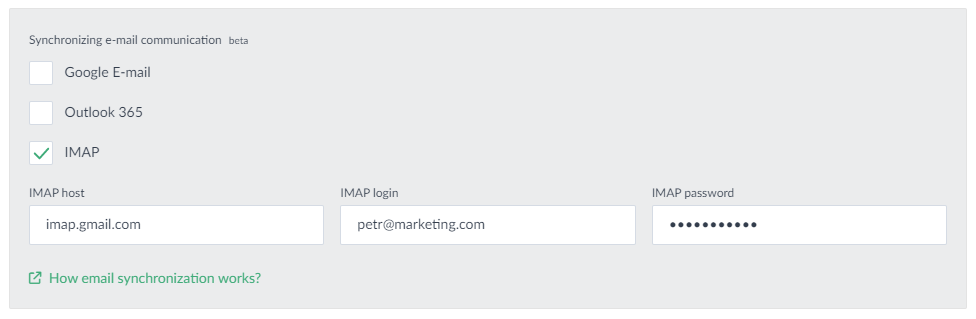
This is a synchronization via IMAP. This method can also be used for Google emails. In the My Profile section in Caflou in the section "Synchronizing e-mail communication", each user whose emails are to be monitored selects the "IMAP" option.
When setting up the synchronization, the user fills in:
- IMAP host: the IMAP server address of your email solution (e.g. imap.gmail.com, imap.forpsi.com, outlook.office365.com, etc.).
- IMAP login: login name, usually an email address
- IMAP password: the password to log in to your email (if you are using multi-factor authentication, see below*)
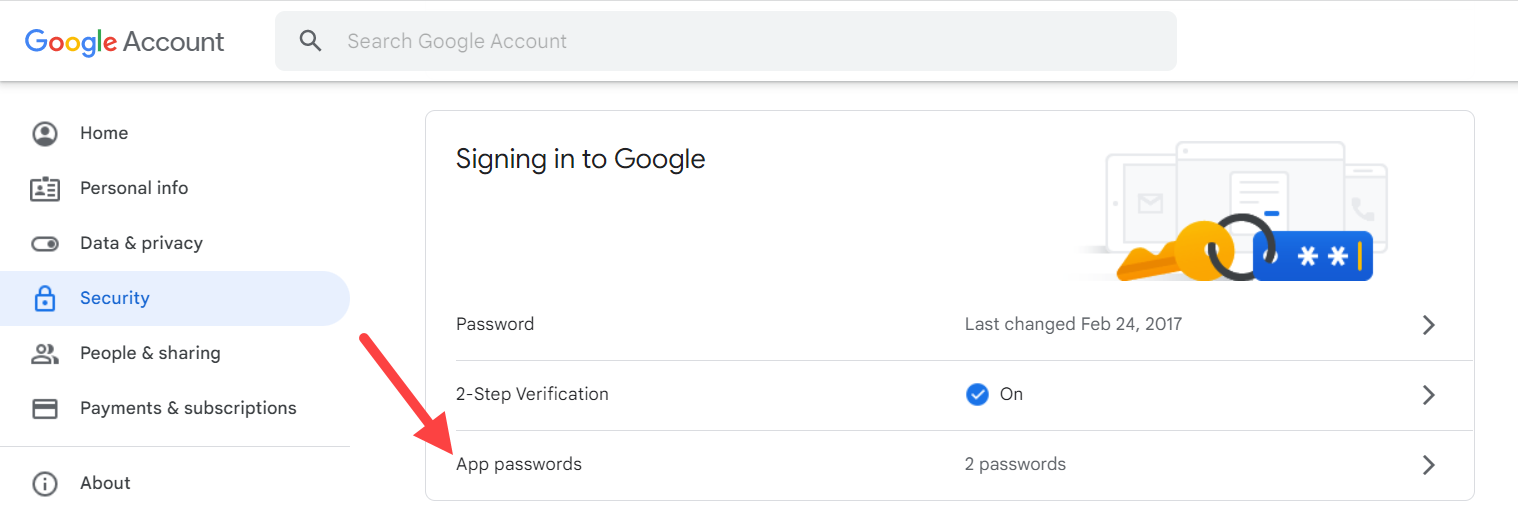
*💡🔐 Please note: if you are using multi-factor authentication for authentication to your email solution, you need to use the application password, which your platform must generate as a unique password for the application, and the system (here Caflou) then logs in using this password for synchronization. For example, for a Google account you can set this password here: https://myaccount.google.com/security: